


Guidelines for Recording your Presentation using Powerpoint
IMPORTANT: These guidelines will help you prepare your recording WITHOUT a speaker video – should you wish to appear in your recording, which is preferred, we invite you to record your presentation using Zoom with these guidelines.
Please be sure to read these guidelines all the way through and to ensure full comprehension before commencing the recording of your presentation.
How to record your presentation using Powerpoint
Please make sure you have ready:
- Your PowerPoint presentation. You can use the ECR PPT template if you would like.
- Internet connection.
- A headset or headphone with a microphone.
- Please use PowerPoint format 16:9.
- You can use the ECR 2024 PPT template if you would like.
- Simplify material on the slide to illustrate a single point or idea. If there is an abundance of data, divide it into several slides. The content of a slide should be comprehensible in 20 seconds.
- Aim to limit your slides to no more than two for each minute of your presentation.
- Be sure the information on the slides of your radiological images is well presented – enlargements of the significant areas and arrows are often helpful.
- Do not overuse animations available in PowerPoint.
- Include in the second slide any conflict of interest that needs to be disclosed or the sentence “I do not have any conflict of interest to disclose” as necessary.
- Avoid any sexist jokes and comments.
- Patient names must not appear on the slides.
- Avoid commercial reference unless mandatory to your presentation.
Recording your presentation using Microsoft PowerPoint
1. Plug in your headset or headphones with microphone to ensure the best audio quality and then open your prepared PowerPoint presentation.
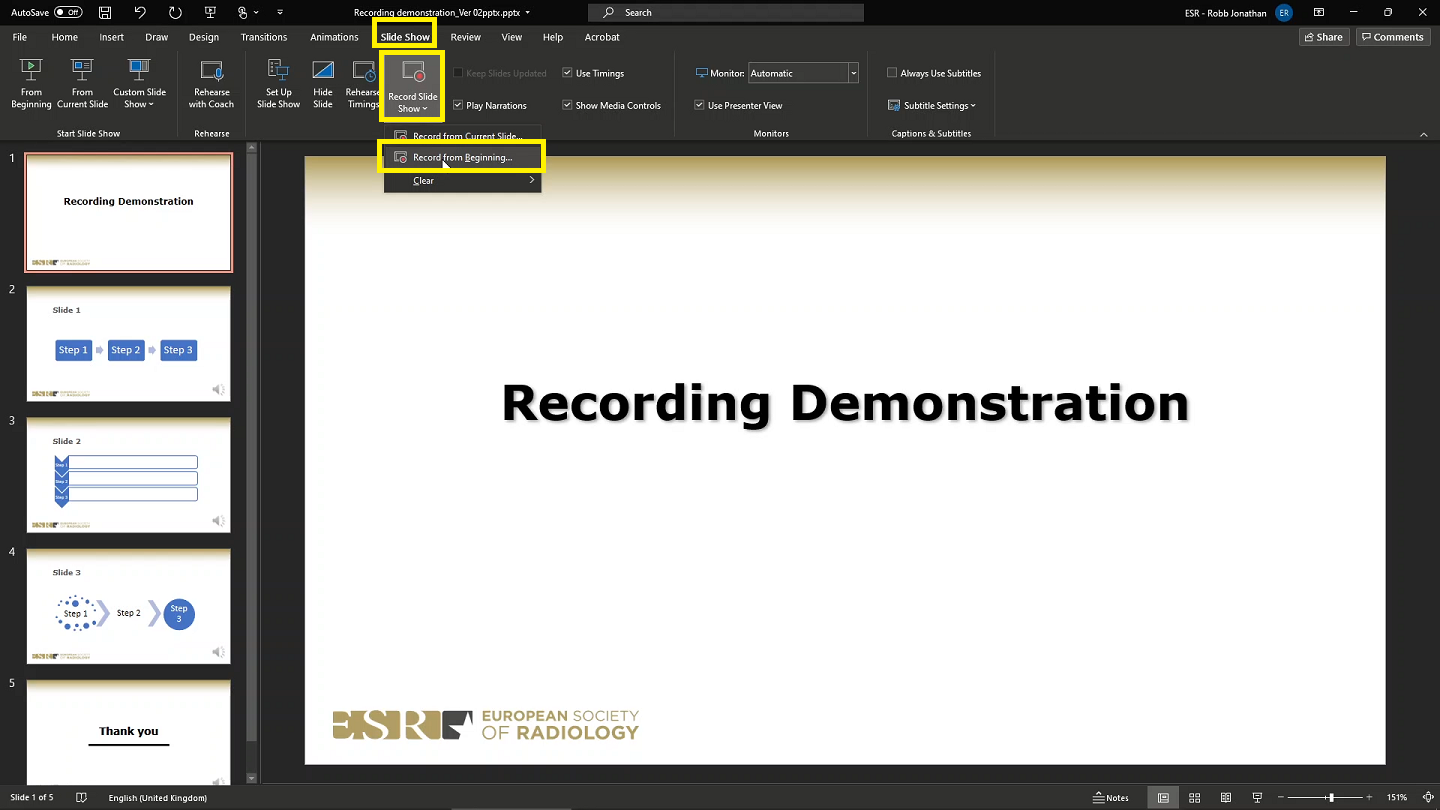
2. Click on the “Slide Show” tab in the ribbon.
3. Click on “Record Slide Show” and “Record from beginning”.
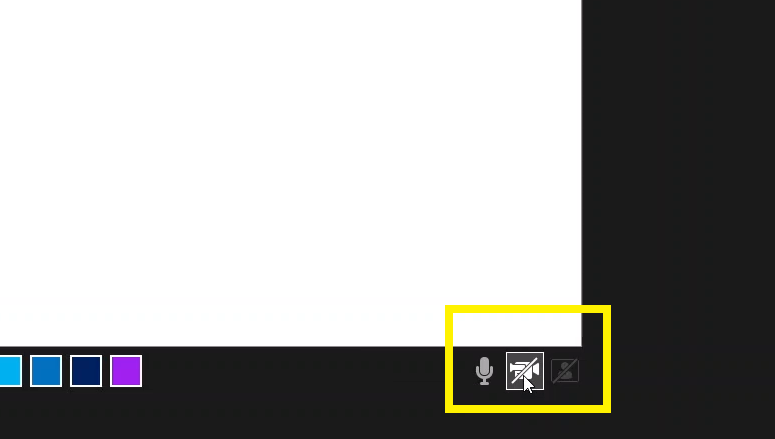
4. If you have a webcam installed, you may find that the camera options have automatically activated. We ask that you turn off your camera as videos prepared using PowerPoint with a presenter window are not compatible with the online platform. If you wish to record a presentation with a presenter window, we invite you to watch our video “Recording Your Presentation Using Zoom”. As we cannot have the camera activated in PowerPoint, you will need to go down to the bottom-right corner and make sure the camera icon is deselected. This way you will only record audio and the transitions of your slides.
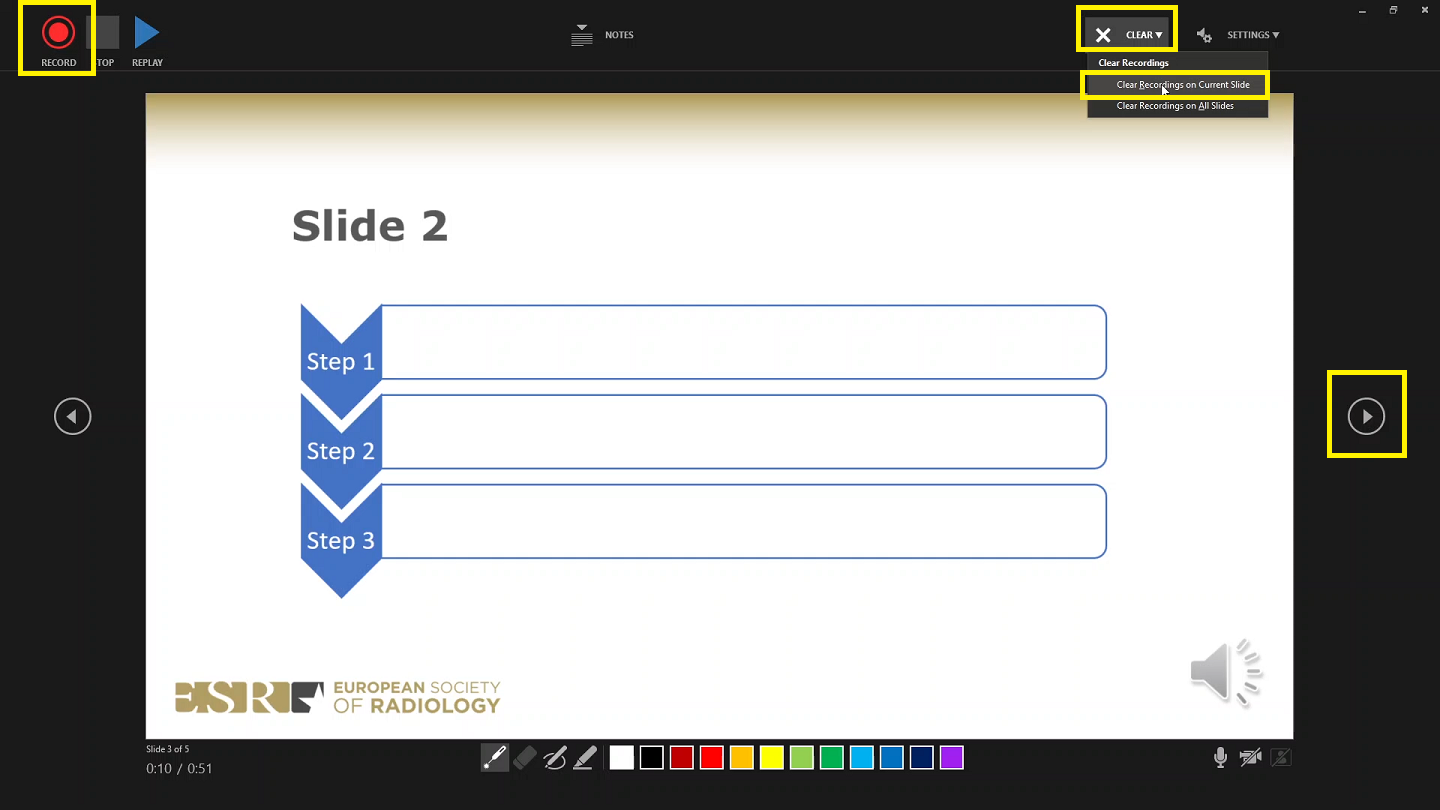
5. When you are ready to start, click on the red record button in the top-left corner – it will give you a countdown (3 – 2 – 1) – and it will start recording. As you progress through your recorded presentation, PowerPoint will automatically embed individual audio for each slide. At any point if you are unhappy with your recording for the current slide, you can pause (||) the recording, move along the top and select “Clear” and click “Clear the recording of the current slide” in order to re-record your narration for that slide. To restart, simply click the red record button again.
6. IMPORTANT: You must briefly pause your narration when changing from one slide to the next as no audio is recorded during the transition of slides.
7. The recording will automatically end once you click the arrow twice to move past your last slide and the final black slide.
8. You have now successfully recorded your presentation. To review the recording, simply “preview” your slide show. If you are unsatisfied with the recording, repeat the previous steps to re-record your presentation.
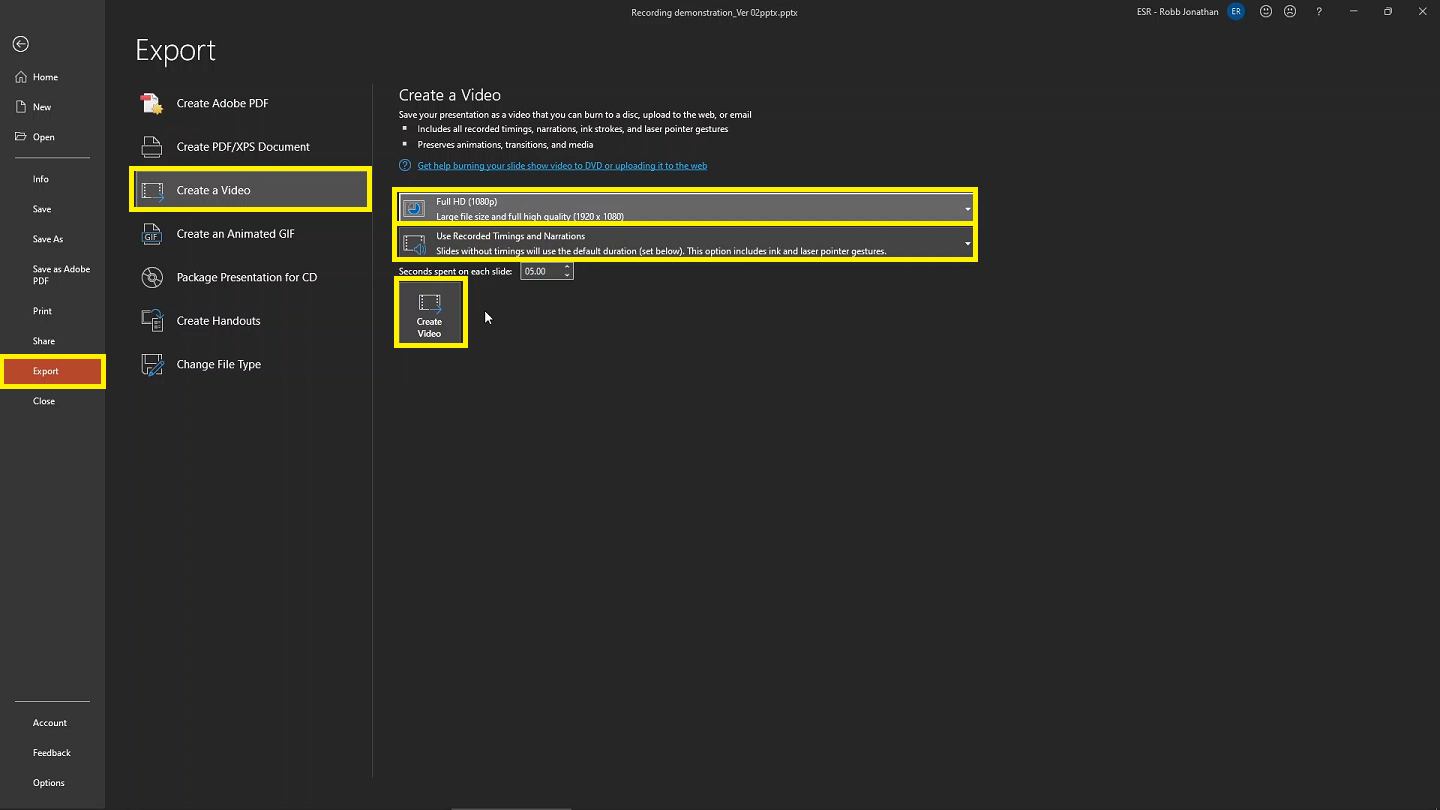
9. Once you are satisfied with your recording, click on “File”, then “Export”, then “Create A Video”.
10. In the drop-down options, make sure to select the settings “Full HD (1080p)” and “Use recorded timings and narrations”.
11. Click “Create Video” and save it as an .mp4 file, being sure to name it with your presentation title and name. A progress bar will appear along the bottom of the window to indicate the progress of the video exportation.
12. Once the progress bar has reached its end and disappeared, locate the .mp4 file of the recording in the containing folder you selected and open it.
13. Review your lecture:
i. Is the audio clear and is there no audio missing when you transition between slides?
ii. Are you happy with the overall lecture?
14. If you are happy with your video, please upload the file as per the emailed instructions.
15. If you are unhappy with your video, repeat the previous steps to re-record your presentation.
For further details on how to record your presentation with PowerPoint on Windows, click here.
For details on how to record your presentation with PowerPoint on Mac, click here.
Further details on how to record your screen with a Mac can be found here.